Automatically Print Orders from Any Printer
Have you ever wished you could have your printer print a packing slip whenever a new order comes in? The latest update to Printout Designer now makes this possible. We have integrated our app with Google Cloud Print which means you can now create automation rules for the printing of documents.
In addition to being able to automate the printing of documents, you can now send a print job directly from Printout Designer to a printer connected to your Google Cloud Print account. This lets you print to printers that aren’t even in the same network. Let’s see what needs to be done to automate the printing of documents.
Google Cloud Print
Connect your printer to Google Cloud Print
The first step is to connect your printer to Google Cloud Print. Some printers have a built-in capability of integrating with the Google Cloud Print. With those printers, after a bit of setup, you can simply connect them to the internet and they’ll be connected to the Google Cloud directly.
However some printers don’t have this capability. There is still a way to connect them to Google Cloud Print. With a printer like this, you’ll have to connect it to a computer and then connect the printer to Google Cloud Print through this computer. The downside of this is of course that this computer needs to be online all the time for the printer to be reachable from the outside world.
You can check which kind of printer you have from this website. The printers that have (v1) or (v2) after its name can be connected directly to Google Cloud Print.
Share your printers with Printout Designer
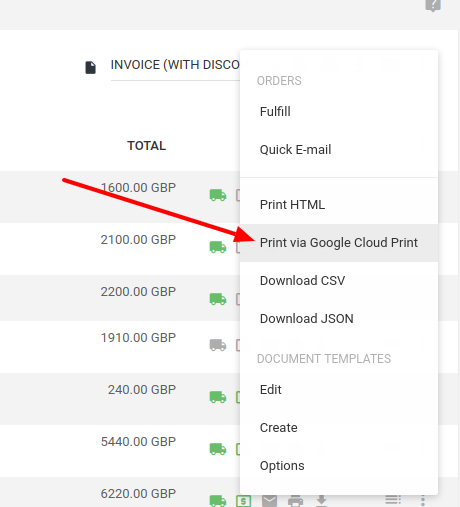
In order to share your Google Cloud Print printers with Printout Designer, navigate to the Google Cloud Print settings view in Printout Designer. Click on “Connect My Google Cloud Printer” and you’ll be redirected to a Google login page. After a successful login you’ll be able to give our app access to your printers. Once Printout Designer has been granted access to your printers, you’ll be able to select your default printer. This printer will be used when you print documents manually and click on “Print via Google Cloud Print”.
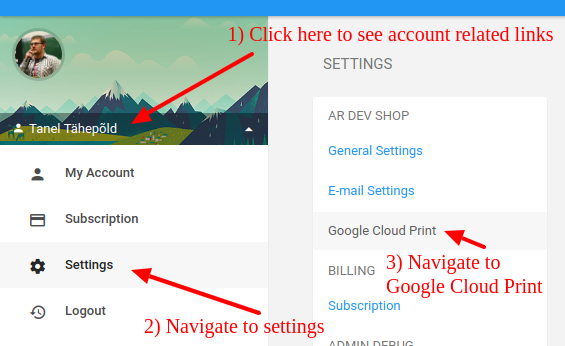
Google Cloud Print settings view in Printout Designer.
Create an automation rule
The final step is to tell Printout Designer when a document is supposed to be printed, what document it should be, which printer to use and how many copies you want. All of this can be specified within an automation rule. Here’s how to create an automation rule for printing. Once the rule is saved, that’s it. If you set the trigger event to order creation then you can now create a new order in your e-commerce platform and see the document being printed out automatically.
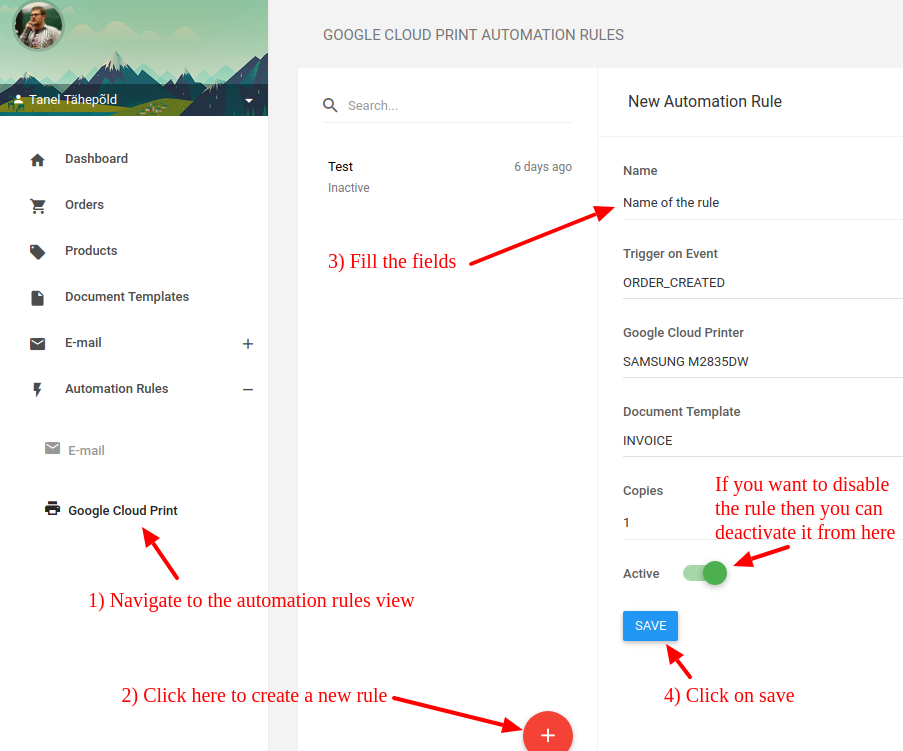
Create an automation rule in Printout Designer
Printout Designer enables you to create invoices, packing slips, labels and other printouts with a truly customized look, independent of the e-commerce platform you use. You can customize every aspect of your business document creation process without wasting countless hours. Read more about Printout Designer from printoutdesigner.com
Tanel is the technical mastermind behind Actual Reports and Printout Designer. When he’s not coding, he also takes an occasional dive into marketing and business development.