Have you ever wished you could have your printer print a packing slip or label whenever a new order comes in? With Printout Designer it is now possible to automate your printing process using the PrintNode service.
PrintNode is a hosted printing service that can help you quickly, easily and securely print your documents from Printout Designer remotely. PrintNode service is available for free for all users starting from the Basic plan. This means that you don’t need a separate PrintNode account and you can find your PrintNode credentials from the PrintNode settings page in Printout Designer.
Activating PrintNode account
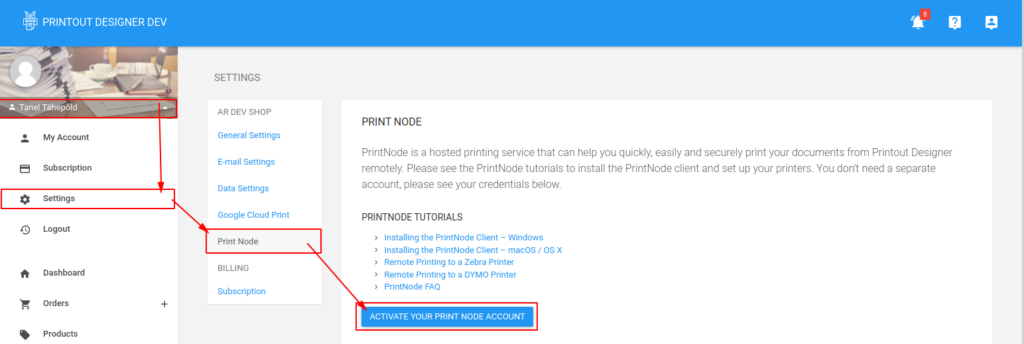
To active your PrintNode account navigate to Settings > Print Node in Printout Designer and click Active your Print Node account.

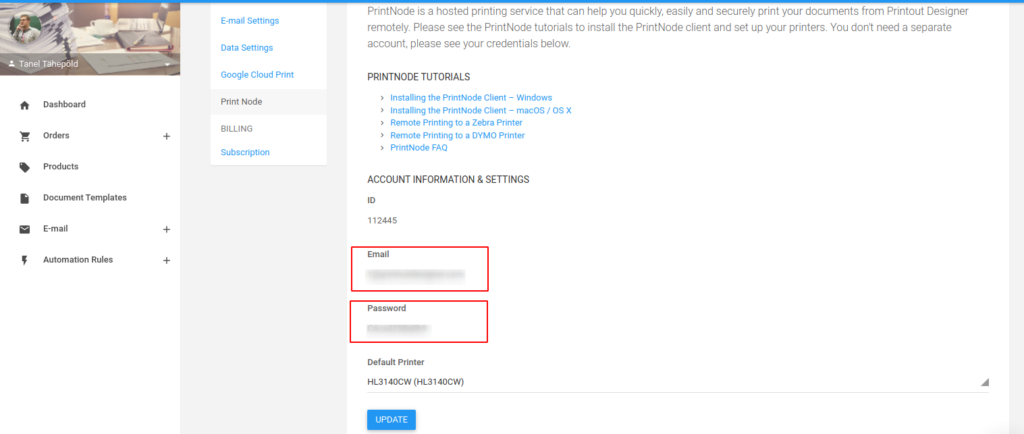
After the account is activated you will see your PrintNode account credentials which you need to use to login to the PrintNode service once you have installed the PrintNode client.

Please see the PrintNode tutorials to install the PrintNode client and set up your printers. After setting up the PrintNode client refresh the PrintNode settings page in Printout Designer to select a Default Printer that is used when clicking Print via PrintNode in the Orders or Products view.
- Installing the PrintNode Client – Windows
- Installing the PrintNode Client – macOS / OS X
- Remote Printing to a Zebra Printer
- Remote Printing to a DYMO Printer
- PrintNode FAQ
Creating an Automation Rule
Once you have activated the PrintNode account, installed the PrintNode client and logged in to the PrintNode with credentials provided in the Printout Designer PrintNode Settings you can start creating Automation Rules to automatically print your invoices, packings slips and labels.
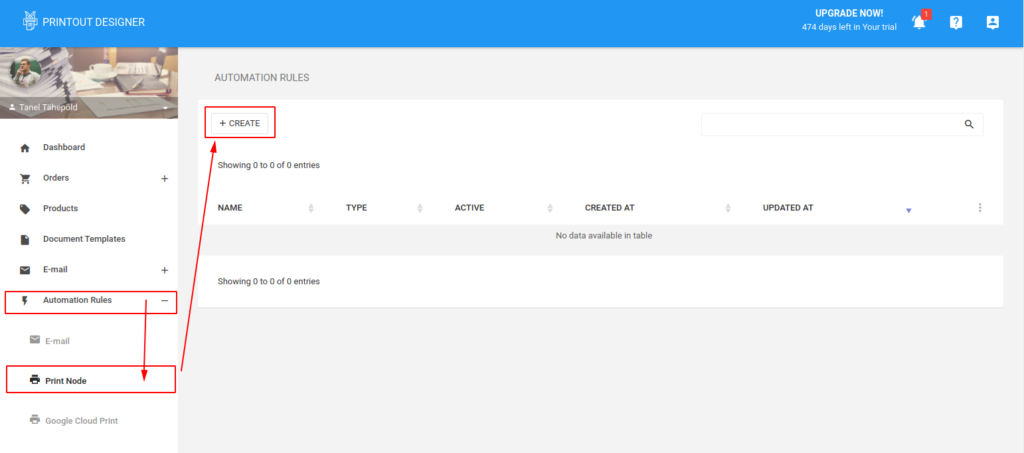
To create a new Automation Rule navigate to Automation Rules > Print Node and click Create.

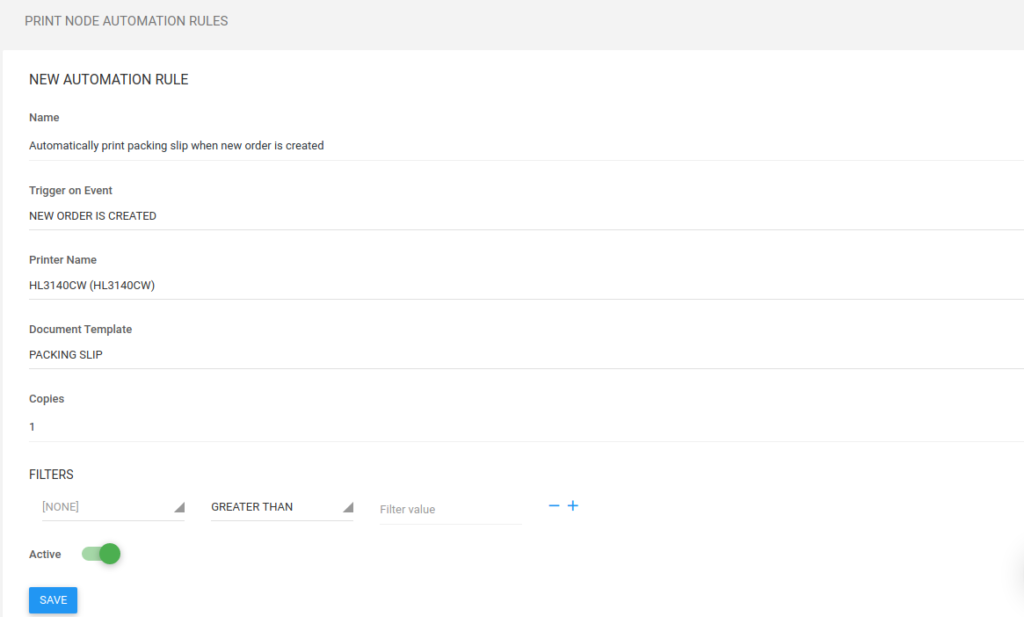
You need to fill the following fields for Automation Rule
- Name – the name of the Automation Rule
- Trigger on Event – specify the event that you want to trigger the event rule. This event is sent from your e-commerce service to Printout Designer
- Printer Name – the print command is sent to the selected printer
- Document Template – select which template is used to generate the printed document
- Copies – you can specify how many copies of the document are printed
- Filter (optional) – you can specify conditions that the order must pass to trigger the Automation Rule. If you specify multiple rules then the order must pass all the conditions.
- Active – you can disable or active the rule any time

Once the Automation Rule is saved it is triggered whenever a new event happens in your e-commerce platform. You will see the history of triggered rules from the Orders > History view.
And that’s it! Happy printing!
Printout Designer enables you to create invoices, packing slips, labels and other printouts with a truly customized look, independent of the e-commerce platform you use. You can customize every aspect of your business document creation process without wasting countless hours. Read more about Printout Designer from printoutdesigner.com
Tanel is the technical mastermind behind Actual Reports and Printout Designer. When he’s not coding, he also takes an occasional dive into marketing and business development.